Oh, salted caramel sauce, how I love thee! If you can relate, this tutorial is for you. The sauce is so easy to make once you know what to do.
I realize caramel can be tricky on your first go, especially if following written instructions without any visuals. That’s why I’ve included a ton of photos in this caramel sauce tutorial. If you follow what I’m about to share, you’ll have a thick, undeniably rich caramel enhanced with a bit of salt to balance the sweetness. Now, I know you may have doubts due to past attempts ending with a saucepan ruined by burnt sugar, or you think you’ll need to put forth a lot of effort and maybe shell out some money for the proper equipment (like a candy thermometer), but you are wrong. This salted caramel requires a saucepan, a whisk, and the ingredients (of course).
Since I’ve literally made this sauce over 100 times, I finally decided to share my trade secrets. Admittedly, the process is far from groundbreaking; however, it will lead to a perfect caramel sauce every time if you follow each step carefully.
Why You’ll Love This Salted Caramel Sauce
Only five ingredients – The ingredients list is short and simple. You probably have everything you need in your kitchen right now. That’s the great thing about salted caramel sauce. Basic ingredients combine to create something impressive.
Luscious texture – This salted caramel sauce is the perfect combination of thick, rich, and gooey, yet it’s fluid enough to drizzle over a sundae.
Delicious, balanced flavors – Caramel sauce is great. Still, salted caramel sauce is much better because salt is a flavor enhancer and balances the flavors so the sauce doesn’t come across as overly sweet.
Salted Caramel Sauce Ingredients Notes
- Granulated sugar: Any good caramel starts with granulated sugar because it melts evenly. It also develops this wonderful depth as it darkens during the caramelization process.
- Butter: Some salted caramel sauce recipes use either heavy cream or butter. I went with both because more decadence is always better! Heavy cream is undoubtedly a more stable emulsion, but butter gives the caramel an extra oomph. Despite being a salted caramel sauce, the recipe uses unsalted butter to control the salt level.
- Heavy cream: The dairy product not only cools down the sugar once it reaches the desired color but also adds complexity to the sauce. You see, the proteins in heavy cream undergo a chemical reaction that greatly enhances the final product.
- Vanilla extract: It has a special way of making the caramel flavor more pronounced and compliments the overall richness.
- Salt: Without it, you just have caramel sauce! Sea salt is best because of its clean salty taste. Additionally, it’s a high-quality yet affordable salt. You don’t want to use table salt here; it will make the sauce too salty.
How to Make Salted Caramel Sauce
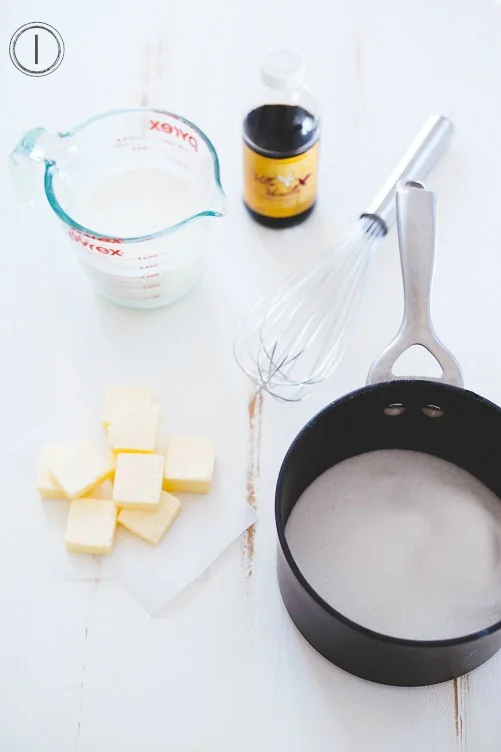
1. Lay out your ingredients: Have everything measured and ready to go on your counter before you put the sugar on heat because once the sugar darkens, you must move quickly to avoid burning it.

2. Melt the sugar: Add the granulated sugar to a medium-sized saucepan and place the saucepan over medium-high heat. It will take a few minutes for the sugar to begin to melt (see image 2), but once it does, whisk continuously until all of the crystals have melted (image 3).
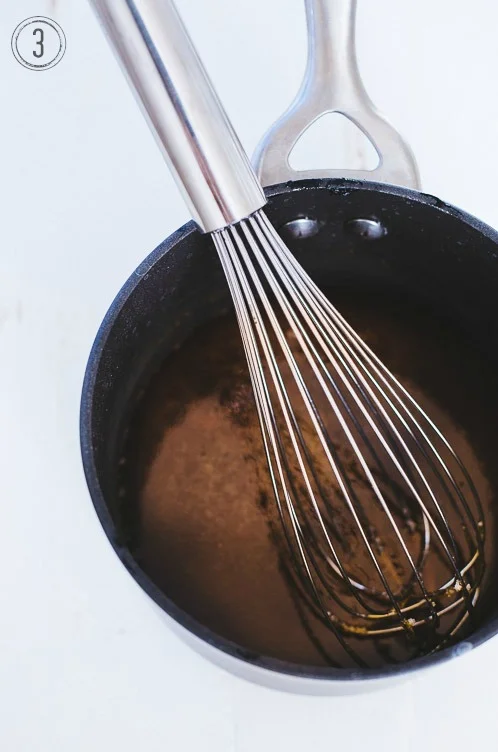
3. Wait for the right color: Keep the sugar over the heat until it reaches a deep amber color (the darker the color, the deeper the flavor). This is where the process gets a little delicate since the melted sugar will burn if left too long, and the smell of burnt sugar is undeniable.
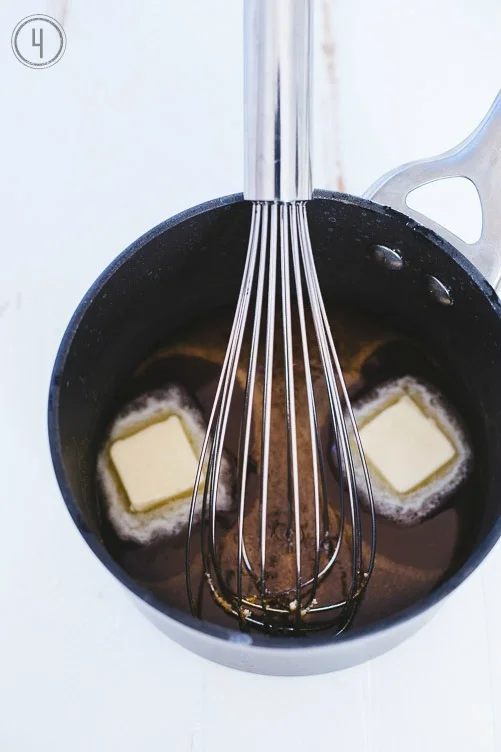
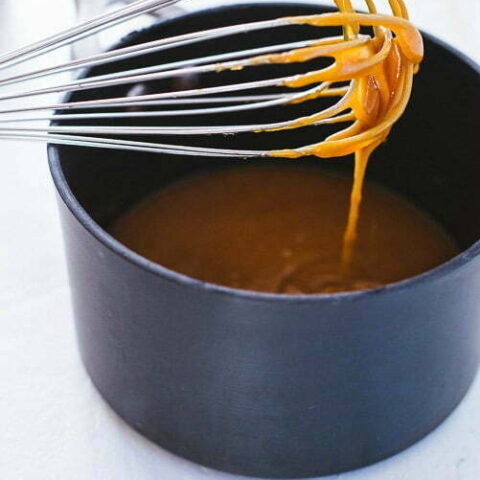
4. Bring on the butter: Add it all at once, then whisk for 1-2 minutes or until it dissolves completely. Your caramel should now have a creamy texture with a rich amber hue (refer to image 5).

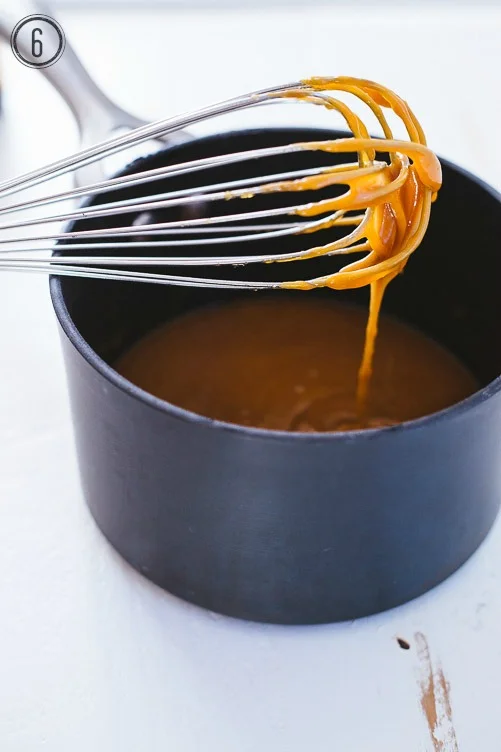
5. Add the cream: Slowly pour the cream into the caramel while whisking continuously. It may look scary for a moment but don’t worry. Keep whisking, and it will return to a creamy texture within a minute.
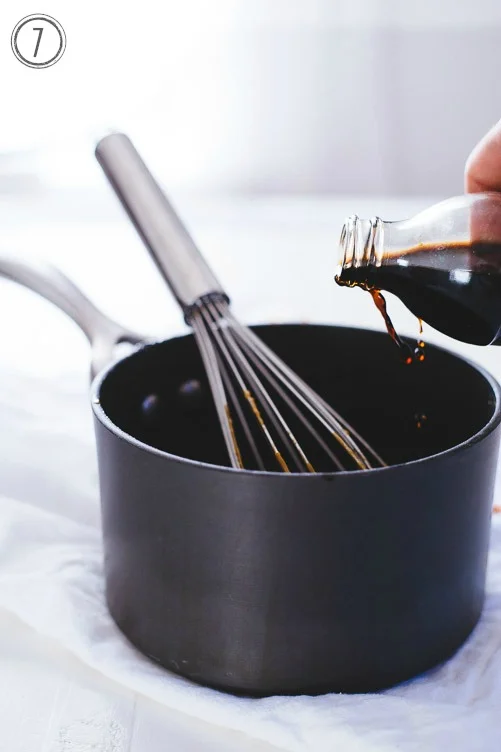
6. Finishing touches: Lastly, whisk in the salt and vanilla once you remove the saucepan from the heat.
Variations, Substitutions, and Tips
Use a light saucepan – Once you get the hang of things, this doesn’t matter; I use a dark saucepan all the time. That said when you’re new to making caramel, a light-bottomed pan makes it easier to monitor the color of the sugar as it darkens.
Try salted butter – If you do, skip adding salt, taste, and adjust the salt level if needed.
Experiment with extracts – Almond extract would be a delicious addition, as would maple or banana if you want to mix things up.
Homemade Salted Caramel Recipe
Oh, salted caramel sauce, how I love thee! If you can relate, this tutorial is for you. The sauce is so easy to make once you know what to do.
Ingredients
- 1 cup granulated sugar
- 6 tbs unsalted butter, room temperature
- 1/2 cup heavy cream
- 1 tsp sea salt
- 2 tsp vanilla extract
Instructions
- Heat sugar in a heavy medium-sized sauce pan over a medium-high heat. Stir or whisk constantly for about 5-6 minutes until all the crystals have melted into a thick, deep brown amber color. The darker the color the deeper the flavor, but not too long that it begins to burn (you'll smell it if it does).
- Next, add the butter and whisk until it dissolves completely into the sugar (about 1-2 minutes). The caramel should now have a creamy texture with a rich amber hue.
- After the butter dissolves into the sugar, slowly pour the cream into the caramel while whisking continuously. It's going to bubble for a bit, but don't worry. Keep whisking and it will go back to it's creamy self in a minute.
- Once the cream is combined, remove from the heat and stir in the salt and vanilla. Stir to combine then remove from the heat and allow to slightly cool.
- Transfer to a container and place in the refrigerator to solidify at least 2 hours or overnight for best results.
Notes
A heavy bottomed pan reduces the chances of burning the caramel.
Adding cream stops the cooking process which is important once you've reached the desired point.
Caramel moves through stages as it cooks and moves from light to dark in color and changes in flavor. This recipe aims for a dark amber color with a stronger caramel flavor, known as dark caramel.
Try these tasty treats next!
