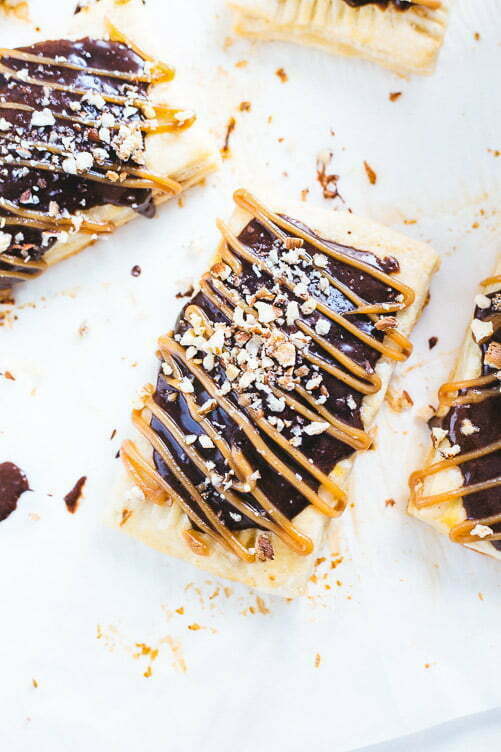
Peanut butter pop tarts are fun plays on classic fluffernutters. The sweet, gooey treats are perfect for breakfast, dessert, and anytime in between!
I was saving this recipe for the “perfect” time but decided I couldn’t hold out on you guys any longer! Every day is a great day to make peanut butter pop tarts. Homemade pop tarts are pretty much the pinnacle of baked goodness. Add peanut butter and marshmallow fluff, and you have stuff dreams are made of! The inspiration behind these peanut butter pop tarts was fluffernutters. The fluffernutter is a sandwich made with peanut butter and marshmallow fluff for those unfamiliar. The duo yields a sandwich with a rich, sweet flavor profile that is undeniably comforting. Moreover, it’s such a simple yet memorable dessert.
Why You’ll Love Peanut Butter Pop Tarts
Fluffy peanut butter filling – These pop tarts are generously filled with a smooth, luscious combination of creamy peanut butter and marshmallow fluff, creating a rich, nutty, yet airy filling. This is what peanut lovers’ dreams are made of.
Flaky pastry shell – The golden, flaky pastry crust provides a satisfying contrast to the creamy, gooey filling, offering an excellent textural balance sure to have you hooked!
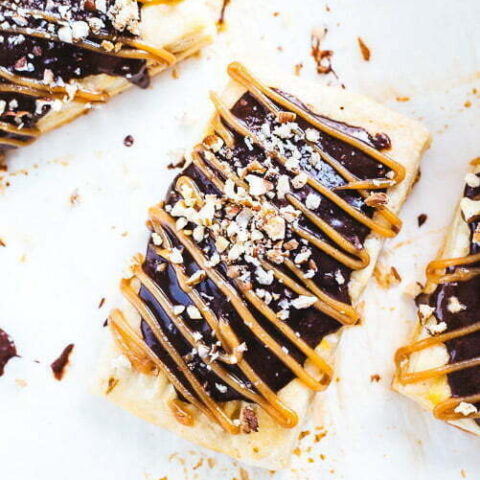
Chocolate icing – When you have peanut butter and marshmallow, a bit of chocolate is expected, right? Otherwise, it feels like something is missing. I don’t make the rules!
Portable and convenient – Peanut butter pop tarts are easy to take with you on the go. Just wrap it in a little parchment sleeve or napkin and enjoy.
Versatile treat – Peanut butter pop tarts are for you whether you want a sweet breakfast, love pop tarts for dessert, or are a sucker for that midday sweet indulgence.
Peanut Butter Pop Tarts Ingredients Notes
- Flour: The outer shell of peanut butter pop tarts is a flaky pastry dough, much like a pie crust. To prepare the dough, you’ll need all-purpose flour. Medium-protein flour is best for a tender crust.
- Butter: Unsalted is the way to go here. Skip the butter spreads. They will not get the job done. As the pastry bakes, the butter melts and creates steam, creating air pockets in the dough that result in irresistibly flaky layers.
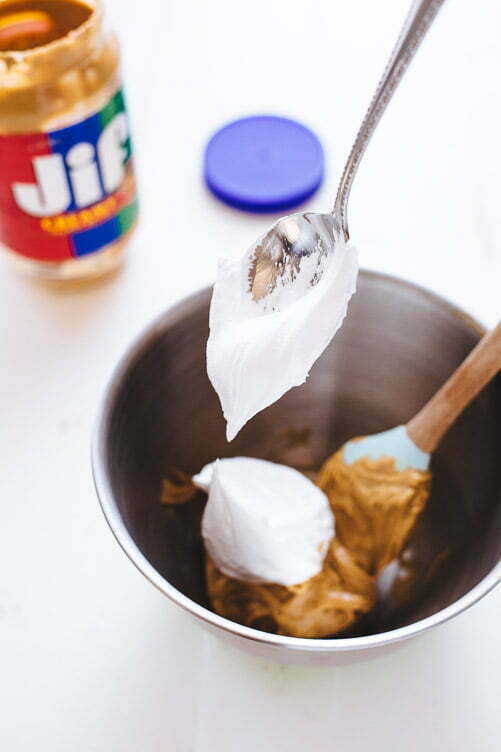
- Marshmallow fluff: The light and fluffy topping has the taste and consistency of melted marshmallows. Purchase it or make your own.
- Peanut butter: I used creamy, although crunchy is fine if you wish to add texture. As for the type, I recommend the standard store-bought peanut butter that you spread on white bread for peanut butter and jelly sandwiches instead of the natural or homemade kind, as it doesn’t separate and isn’t runny.
- Cocoa powder: Cocoa powder, powdered sugar, and a few other ingredients combine to make the chocolatey icing that tops each pop tart. Use natural cocoa powder or Dutch process for a deep, almost black color.
Check out the recipe card below for a complete ingredients list with measurements.
How to Make Peanut Butter Pop Tarts
Now, I know that this recipe is a little labor intensive, but the most challenging parts are making the dough, which isn’t difficult at all (the most labor-intensive step is cutting the butter into the flour, promise), and waiting for these to bake! To make:
- Prepare the dough: Mix the dry ingredients, then cut the butter into the flour using two forks or do it by hand. Just work quickly if using your hands since your body heat can melt the butter. Afterward, slowly drizzle in ice water, in one-tablespoon increments, as you mix until the dough clumps.
- Form and chill: Form the dough into a ball, divide the ball in half, flatten each half so you have flattened disks, then tightly wrap each disk in plastic. Chill the dough in the fridge for at least an hour.
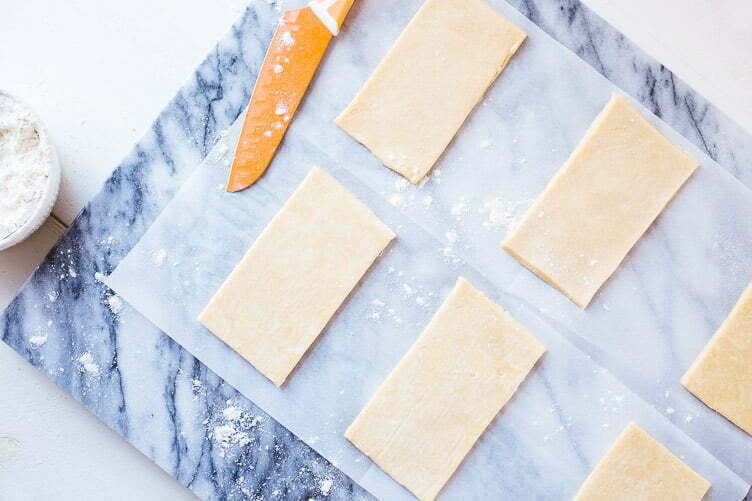
- Roll and trim: Working with one at a time, roll each disk out into a 9×12 inch rectangle, trim the edges, cut in half lengthwise, then into thirds diagonally.
- Fill and seal: Fold the peanut butter and marshmallow fluff to make the pop tart filling, add a tablespoon of filling to the center of each pop tart, and seal with the tines of a fork.
- Freeze and bake: Briefly freeze, then brush the tops with egg wash and bake. Cold butter plus a hot oven will yield flaky pop tarts.
- Finish: Peanut butter pop tarts aren’t pop tarts without the icing. Sprinkle chopped nuts over the top of each pastry before the icing sets.
Variations, Substitutions, and Cooking Tips
Add Nutella – Replace half the peanut butter with the hazelnut chocolate spread for a peanut butter chocolate filling.
Go classic – If you’re not a chocolate fan, replace the chocolate icing with a standard white icing.
Try chocolate pastry – To make chocolate dough, replace ¼-1/3 cup of the flour with cocoa powder.
Brush with cream instead – If you have an egg allergy, brush the top of each tart with heavy cream instead of egg before baking. Those with an egg allergy should also use egg-free marshmallow fluff.
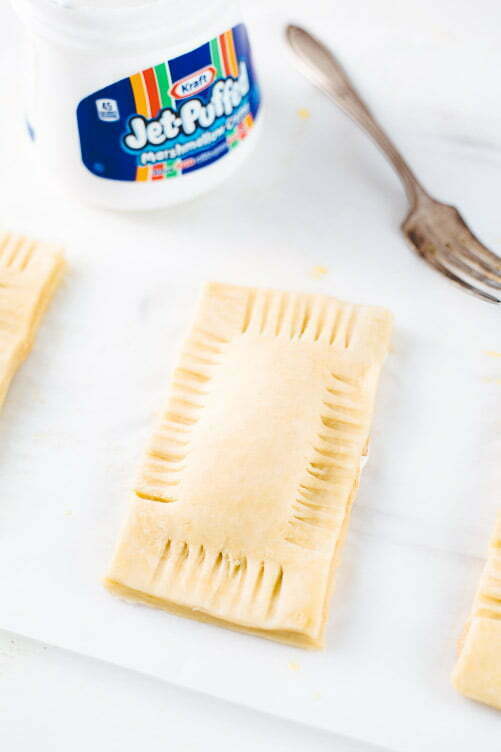
Bake on parchment – It makes for easy cleanup and prevents uneven browning at the bottom of each pop tart.
Make Ahead
Peanut butter pop tarts are great make-ahead treats. Either prepare the dough in advance and refrigerate overnight or freeze the dough for up to two weeks. The dough is the most labor-intensive part aside from assembly, after all. Alternatively, baked peanut butter pop tarts can be stored in an airtight container at room temperature for 3 days or in the refrigerator for 6 days.
Peanut Butter Pop Tarts (Fluffernutters)
Peanut butter pop tarts are fun plays on classic fluffernutters. The sweet, gooey treats are perfect for breakfast, dessert, and anytime in between!
Ingredients
Pop Tart Dough
- 2 and 1/2 cups all-purpose flour
- 1 and 1/4 tsp salt
- 12 tbs chilled unsalted butter, chilled and cut into small cubes
- 1/2 cup ice water
Fluffernutter Filling
- 1/2 cup peanut butter
- 1/2 cup marshmallow fluff
Icing
- 1/2 cup powdered sugar
- 1/4 cup cocoa powder
- 3 tb. water
- Toppings
- 2 tbs peanut butter
- 1 tbs heavy cream
- 1/4 cup crushed hazelnuts (or peanuts)
Instructions
- First, mix the flour and salt together in a large bowl. Add cold unsalted butter and, using two forks, cut the butter into the flour until the mixture resembles coarse meal.
- Measure 1/2 cup of ice and water in a glass. The ice helps the fats stay chill and keeps the pastry nice and flakey.
- Slowly drizzle in the very cold water to the flour mixture, 1 tablespoon at a time, stirring after every tablespoon of water that you add. Stop adding water when the dough begins to clump and do not add any more water than needed.
- Turn the dough onto a floured work surface and knead with your hands. The dough should come together easily and should not feel overly sticky.
- Form the dough into a ball, divide in half, then flatten each half into 1-inch thick discs using your hands.
- Wrap each tightly in plastic wrap and refrigerate for at least 1 hour or overnight.
- Once the dough has chilled, take one disk out of the fridge and let stand for 3-5 minutes.
- Roll out on a floured surface into a large rectangle (about 9x12) and transfer the dough to a parchment- lined baking sheet.
- Trim the edges then cut in half lengthwise, and into thirds horizontally. This should form 9 rectangular pieces.
- Repeat these steps with the other half of the dough then place both baking sheets in the refrigerator.
- Preheat the oven to 350 Fahrenheit.
- To make the filling, fold the peanut butter and marshmallow fluff together.
- Remove both of the baking sheets and brush the tops of the pop tarts with egg wash.
- Using a small ice cream scoop or spoon, add about 1 tablespoon of filling to the center of each pop tart (do this to only 1 of the baking sheets).
- Take the second sheet (without filling) and place the pop tart dough egg-wash-side down on top of the halves with filling.
- Seal together using your fingers, then use a fork to make the edge marks.
- Place in the freezer for about 5 minutes.
- Before placing in the oven, brush the tops of the formed pop tarts with egg wash then bake for about 22-28 minutes.
- After baking, sprinkle chopped nuts over the top of each pastry before the icing sets.
Notes
Make the dough ahead of time and refrigerate overnight or keep in the freezer for up to 2 weeks.
Try these delicious treats next:

